ASP.NET membership, role and profile features make it easy to develop a membership driven web site. However, equally important is a way to administer and manage the users registered with the web site. If you have managed any membership driven web site then you would be familiar with the complaints about forgotten passwords, forgotten user ids and change in email addresses.
Visual Studio provide an inbuilt tool called Web Site Administration Tool that allows you to administer various aspects including membership, roles and application configuration. However, many times it is needed that the user management facility be provided as a part of the web site itself. This way the web site administrator can manage the users from anywhere. The Web Site Administration Tool suffers from some limitations in such cases. Those limitations are:
- We can not make that tool as a part of your web site
- The look and feel of the tool may not fit in the theme of our web site
- We can not view and manage all the information about the users. E.g. user status and activity
- We can not view profile information of the users
- We can not do tasks such as password retrieval and reset
- The tool allows us to modify settings other than membership and roles which might be undesirable
The User Administration Tool
Because of these limitations often we need to roll out our own administrative pages that handle user administration. In this article we will develop a user control that will allow us to administer all the aspect of users and their membership. Specifically the user control will allow us to:
- Create new users
- Search for one or more users
- Modify user information such as email and comments
- See status of a user
- View activity of a user
- Manage password of a user
- Manage role information
- View and modify profile information of a user
We will create it as a user control so that it can be added easily to any of the existing web forms. For the rest of the discussion we will call our user control as “User Administration Tool”.
Before we begin any development let’s see how the User Administration Tool is going to look like.
Figure 1 shows the User Administration Tool.
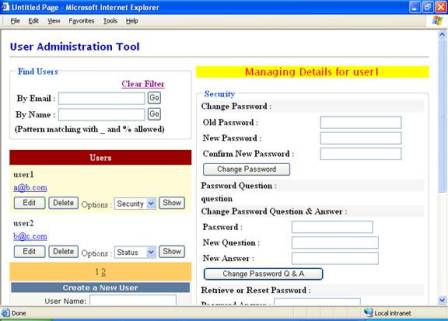
Figure 1 : The User Administration Tool
The tool consists four major sections. On the top it provides searching facility. Search can be based on email or user name. Wild cards (_ and %) are allowed.
Below the search area a GridView displays list of all the users or users filtered depending on the search criteria. The user can be deleted using the Delete button. There is a DropDownList that allows you select which options to display and upon clicking on the Show button the information is displayed on the right hand side. You can also change the email address and comments of a user.
Below the GridView there is facility to create new users.
The right hand side area i.e. the area below “Managing Details for…” label displays various settings related to user status, activity, security, roles and profile.
Creating a web site and a database
In order to begin, create a new web site in VS.NET 2005. Add a new Web User Control called Members.ascx. Open SQL Server Management Studio and create a new database called UserAdminToolTestDb. Note that we could have used an existing database such as Northwind but for the sake of completeness we are create a brand new database. Figure 2 shows the New Database dialog of SQL Server Management Studio.
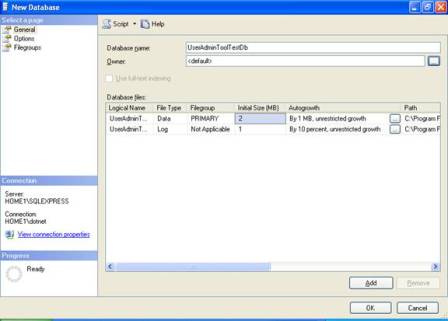
Figure 2: New Database dialog of SQL Server Management Studio
Configuring membership, role and profile providers
Now that we have created the database it’s time to configure it to support membership, roles and profile features. These features are collectively called as application services. ASP.NET provides a command line tool called aspnet_regsql.exe that can be used for enabling and disabling the application services. The aspnet_regsql.exe tool can be used in command line mode or wizard mode for this purpose. We will use the later mode for configuring the database.
Open Visual Studio.NET 2005 Command Prompt from the Visual Studio 2005 program group. Type aspnet_regsql.exe and hit enter. The aspnet_regsql tool should start itself in wizard mode. The wizard consists of five steps. Figure 3 shows the first step of the wizard.
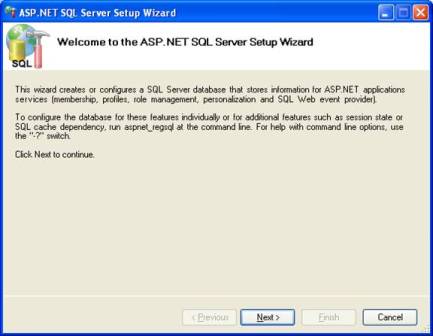
Figure 3: Step 1 of aspnet_regsql.exe tool
The second step (Figure 4) asks you whether you want to enable or disable application services. Select “Configure SQL Server for application services” radio button and click on Next.
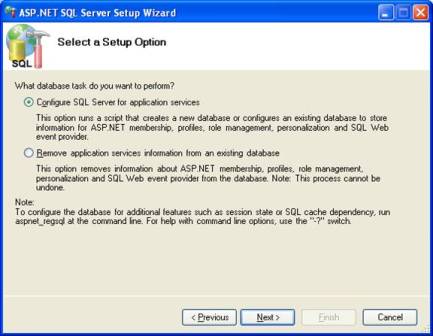
Figure 4: Step 2 of aspnet_regsql.exe tool
The third step (Figure 5) accepts database details such as server name, authentication method and database name. After entering the required details click Next.
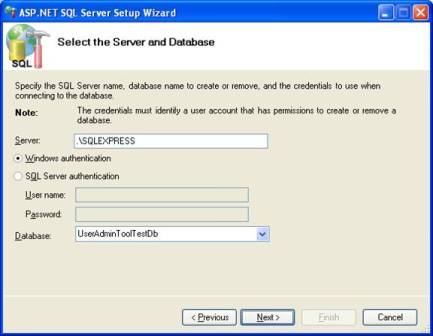
Figure 5: Step 5 of aspnet_regsql.exe tool
The fourth step (Figure 6) simply shows the summary of the settings. Clicking Next actually starts the configuration process.
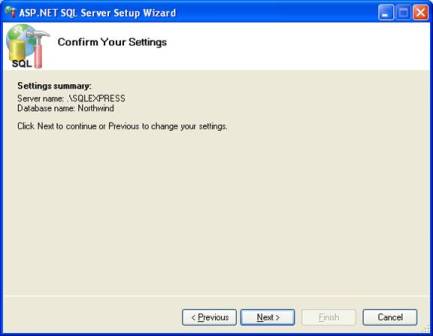
Figure 6: Step 4 of aspnet_regsql.exe tool
The final step (Figure 7) is just a confirmation that the tool has configured the database correctly.
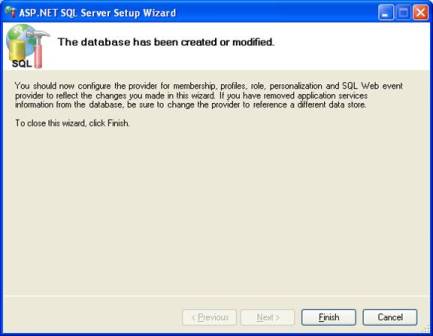
Figure 7: Step 5 of aspnet_regsql.exe tool
The aspnet_regsql.exe tool creates several tables and stored procedures (prefixed with aspnet_) in the underlying database. These tables and stored procedures are used by the membership, roles and profile features.
Configuring the membership, role and profile providers for web site
Configuring your database for supporting membership, role and profile features is just half part of the story. We also need to configure the web site so that Membership, Roles and Profile objects (as well as login controls if they are being used in the web site) correctly point to the required data store. This is achieved by adding some markup in the web.config file.
Open the web.config file and add a
Figure 8: Storing database connection string
The
Now add the markup as shown in Figure 9 to configure membership and role provider.
Figure 9: Configuring membership and role provider
The
Finally, add the markup for configuring profile provider and profile properties. The markup looks as shown in Figure 10.
Figure 10: configuring profile provider
The
Designing the GridView for displaying list of users
Now that we have set up the database let’s display a list of users in a GridView. In order to do so open the Members.ascx user control that we added to the web site earlier. Add a base table with three rows and two columns on to the user control designer. Drag and drop a GridView control as shown in Figure 1. A collection of MembershipUser objects will be acting as the data source for the GridView. Set AllowPaging property of the GridView to true. From the smart tag of the GridView click on “Edit Columns…” link to open the Fields dialog. Figure 11 shows the Fields dialog of the GridView.
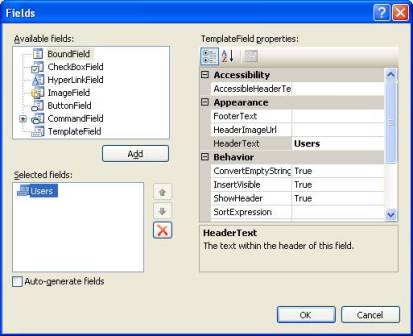
Figure 11: Fields dialog of GridView
Add a TemplateField and set its HeaderText property to “Users”. Ensure that “Auto-generate fields” checkbox is unchecked and close the dialog. Design the ItemTemplate and EditItemTemplate as shown in the Figure 12.
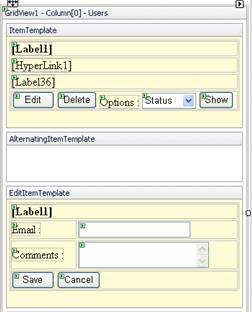
Figure 12: ItemTemplate and EditItemTemplate of GridView
The ItemTemplate consists of a Label control for displaying the user name, HyperLink control for displaying email address and another Label control for displaying comments about the user. The template also has Button controls titled Edit and Delete. Finally, there is a DropDownList that contains possible user options (Status, Security etc.) and a Button titled Show.
Once you design the ItemTemplate open the smart tag for user name Label and select “Edit DataBindings…” option to open DataBindings dialog as shown in Figure 13.
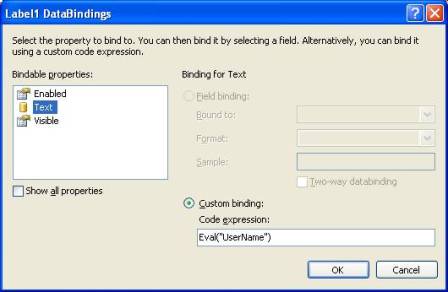
Figure 13: DataBindings dialog
Select Text property from the “Bindable Properties” list. In the “Code expression” textbox enter Eval(“UserName”). This will bind the Text property of the Label with the UserName property of the underlying data element. Similarly bind the Text and NavigateUrl properties of the HyperLink with Email property of the underlying data element. Also bind Text property of comment label to Comment property of the underlying data element. From the smart tag of DropDownList select “Edit Items…” option to open the ListItem Collection Editor as shown in Figure 14.
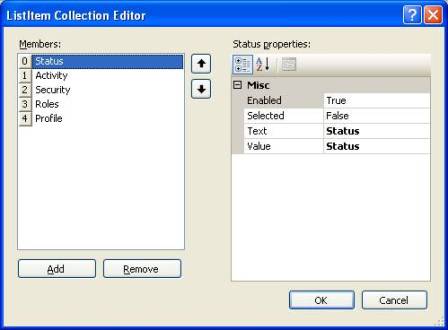
Figure 14: ListItem Collection Editor
Add five items namely – Status, Activity, Security, Roles and Profile. Finally set the CommandName property of Edit and Delete buttons to “Edit” and “Delete” respectively. This completes the design of ItemTemplate.
The EditItemTemplate consists of a Label control for displaying user name and two textboxes for editing email and comments respectively. The newly entered data is saved using the Save button and the edit operation can be cancelled using the Cancel button. Data bind the Label and Textboxes with UserName, Email and Comment properties exactly as before. Also set the CommandName property of the Save and Cancel buttons to “Update” and “Cancel” respectively. This completes the design of EditItemTemplate.
Designing user interface for searching users
In order to design a user interface for searching users, drag and drop a Panel control above the GridView that we just designed. Set the GroupingText property of the panel to “Find Users”. Add a table with four rows and two columns and place controls as shown in Figure 15.
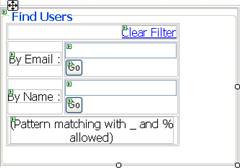
Figure 15: Find Users panel
The Find Users panel consists of two Textboxes for accepting search criterions for email search and user name search respectively. Search criteria can contain wild cards _ (single character) and % (any number of characters). Clicking on the respective Go button will display only the matching records in the GridView. At the top there is a LinkButton for clearing the filter criteria so that the GridView displays the complete list of users.
Designing user interface for creating new users
Designing user interface for creating new users is fairly simple. Simply drag and drop a CreateUserWizard control below the GridView that we designed previously. Apply some formatting theme to it if required. That’s it.
Designing user interface for displaying user details
The user interface for displaying user details consists of MultiView and View controls. In order to design the interface, drag and drop a MultiView control on the right hand side of the GridView and Find Users panel (refer Figure 1). Drag and drop five View controls inside the MultiView control. Further drag and drop a Panel control in each of the View control and set their GroupingText property to User Status, User Activity, Security, Role Management and Profile Management respectively.
Design the first View control as shown in Figure 16.
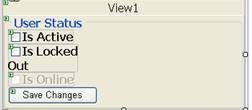
Figure 16: View control for displaying User Status
The View for User Status consists of three Checkbox controls and a Button control. The checkboxes indicate if the user is active, locked out or online. The administrator can mark a user as inactive by un-checking the Is Active checkbox. The “Is Locked Out” checkbox is enabled only if the user is locked i.e. user can only be unlocked by the administrator. The “Is Online” checkbox is always disabled. It simply displays the on-line status of the user. The changes can be saved by clicking the Save Changes button.
Now design the second View control as shown in Figure 17.
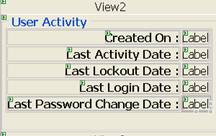
Figure 17: View control for displaying User Activity
The second View control shows the activity of the user in terms of creation date, last activity date, last lockout date, last login date and last password change date. All the information displayed here is read only.
Design the third View control as shown in Figure 18 and 19.
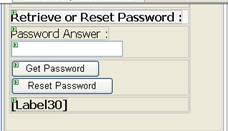
Figure 18: View control for managing security details
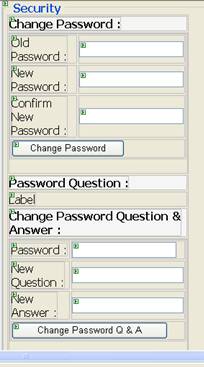
Figure 19: View control for managing security details
The third View control allows the administrator to change the password of a user or the password question and answer. It also allows the administrator to retrieve or reset the password. The Get Password button is enabled only if the password retrieval feature is enabled on the membership provider. Similarly the Reset Password button is enabled only if the password reset feature is enabled on the membership provider. Note that for the sake of simplicity we have not taken any care of validating the inputs.
It’s time to design the fourth View control. This View control allows the administrator to manage roles in the system as well as user to role mapping. Design the View control as shown in Figure 20.
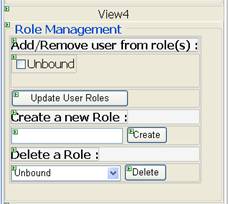
Figure 20: View control for managing roles
The “Add/Remove user from role(s)” section displays a list of all the roles with the roles to which the user belongs to as checked. The administrator can add or remove the user from one or more role(s) and click on Update User Roles button to save the changes. The administrator can also create a new role or delete existing roles. Note that for the sake of simplicity we have not taken any care of validating the inputs.
Finally design the fifth View control as shown in Figure 21
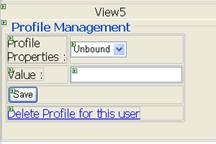
Figure 21: View control for managing profile
The fifth View control allows the administrator to manage profile of a user. A DropDownList shows a list of all the profile properties. The property values can be read or changed. Clicking on the Save button saves the changes. The administrator can also delete the profile of the user. Note that profile properties can be of a user defined type (customer class for example). Such properties of course can not be read or modified via this tool.
That’s it! We have just completed designing the user interface of the User Administration Tool. The mark up of Members.ascx is bit lengthy and hence not given here. You can get it in the download accompanying this article.
Conclusion
Membership, Role and Profile features come handy while building a secure membership driven web site. Often the administrators need a tool that allows them to manage users easily. In the Part 1 of this series we kicked off developing such a flexible yet simple tool. We developed user interface of a web user control for managing various aspect of user administration such as password recovery, role mapping and profile management. In the Part 2 of this article we will code the functionality to make our user control functionalNote : this article is collected from the website all right reserved BinaryIntellect Consulting.

No comments:
Post a Comment